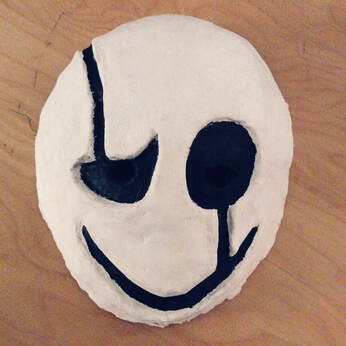
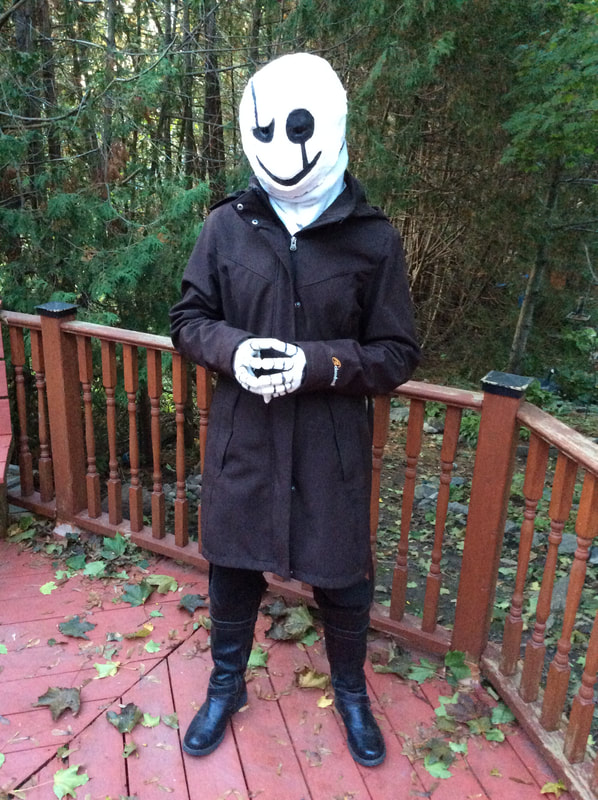
 This years Hallowe'en challenge was to make a costume for a character from the game Undertale named Gaster. My daughter loves this game and wanted to come up with a costume for this character. I am always up for a costume challenge. The costume was pretty simple except for the face and hands. We needed to make a mask out of paper clay that would still allow her to see through.
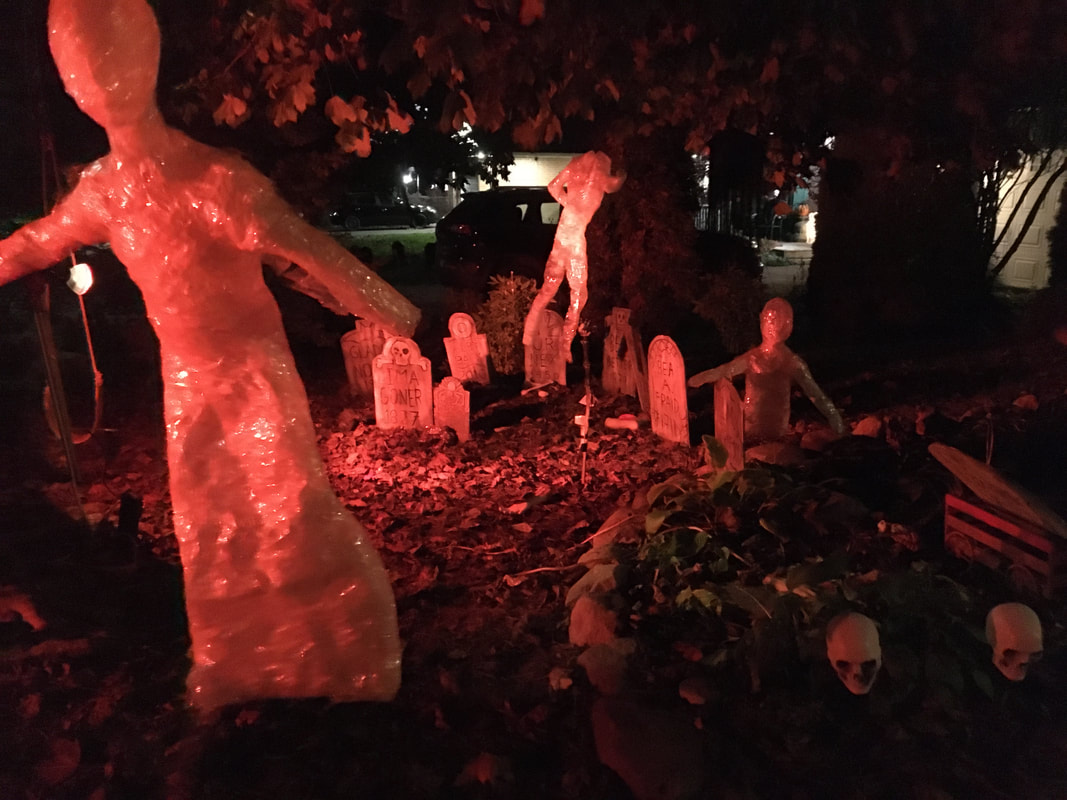 Our spooky front yard with home made tombstones and packing tape ghosts.
0 Comments
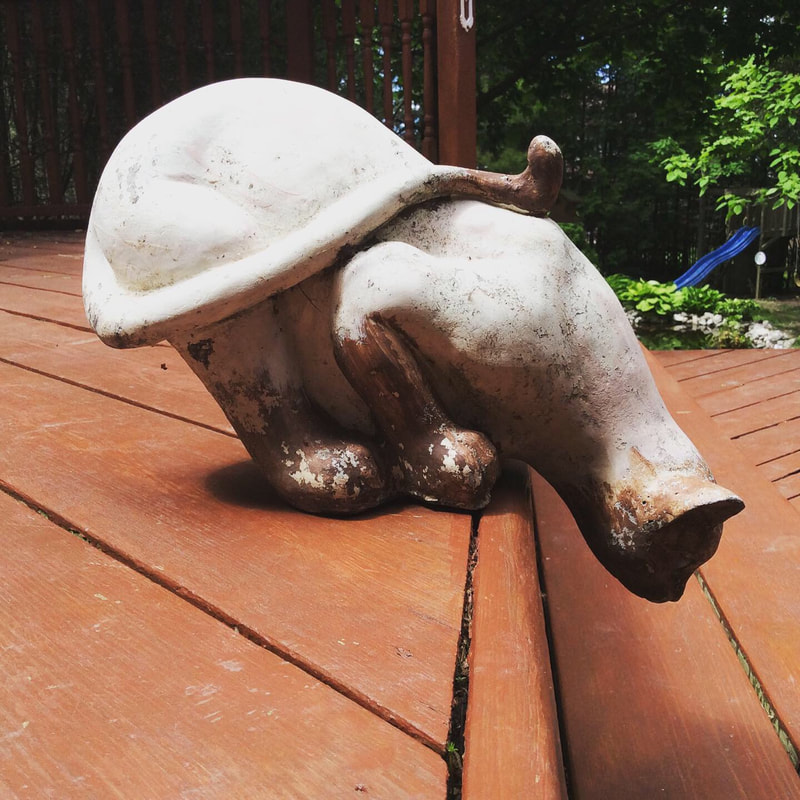
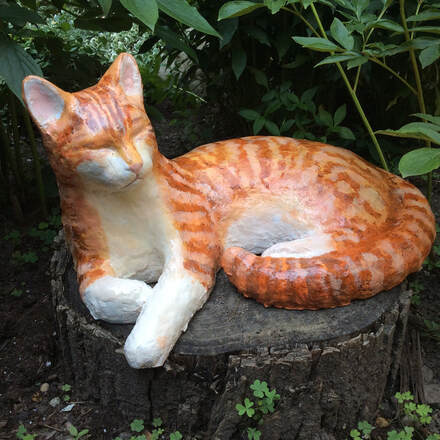 I have repaired and restored a few cat statues this past year. One was a statue given to me by a friend years ago upon the death of one of our cats. It has been in our garden for 10 years slowly crumbling away. I finally decided to make some paper clay to rebuild the parts that had crumbled and then repainted it to resembled the cat that we had lost. I found a great water sealant to keep both the paint and paper clay sealed tight against the rain and snow. It looks great and our memorial statue of our cat "Pyro" is back in the garden again.  The second job was on an old stone cat from my grandfathers house that had long since worn away its paint. I didn't have to do any real repair so I just sanded it down, painted it and sealed it for use in the garden. It has been returned to my parents house where it sits leaning over their pond.
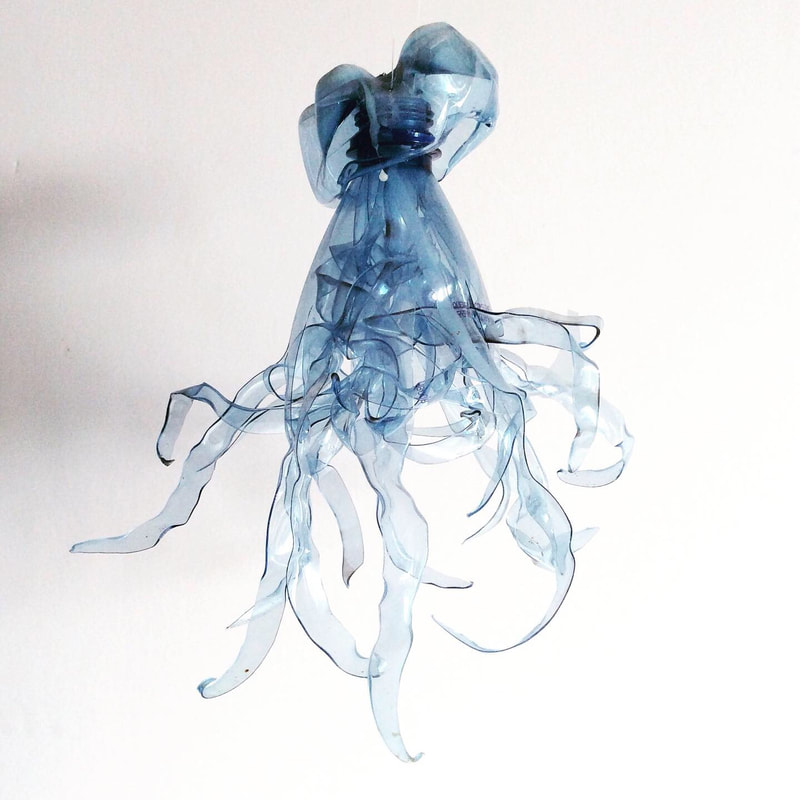
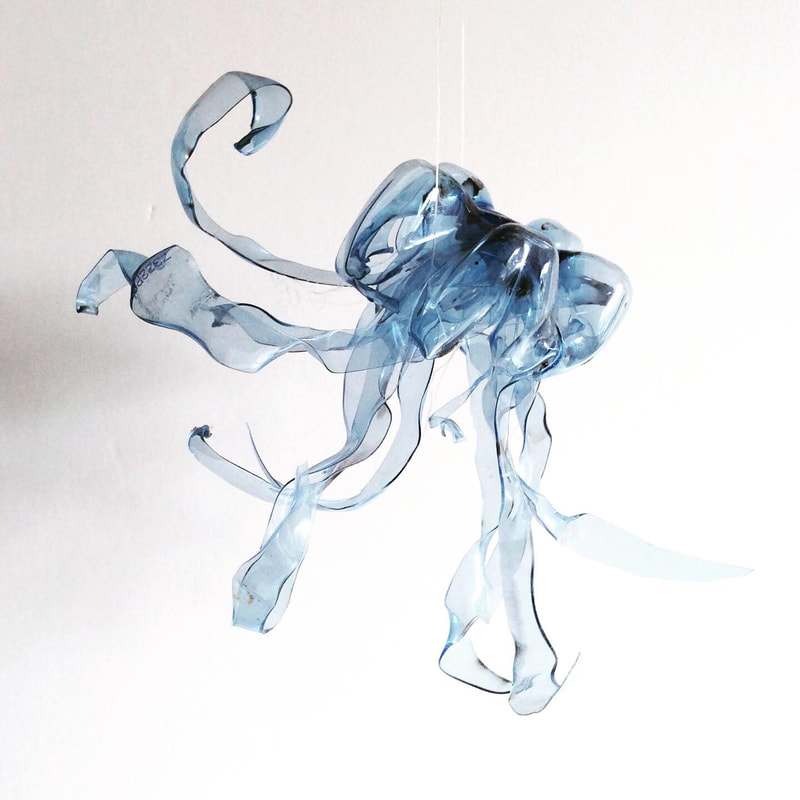
I love glass sculptures but have no means for making them myself. I was able to make an interesting sea jelly sculpture out of plastic water bottles using only a pair of scissors and a small candle. It was quite fun heating and warping the plastic strips and then assembling the sculpture. It was also fun to experiment with the different shapes I could make. I think these would be really neat if there were dozens of them hung up and maybe lit up somehow. It would be a neat garden installation.
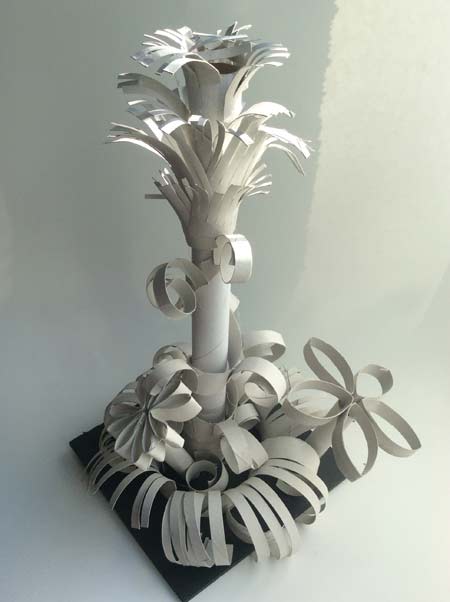
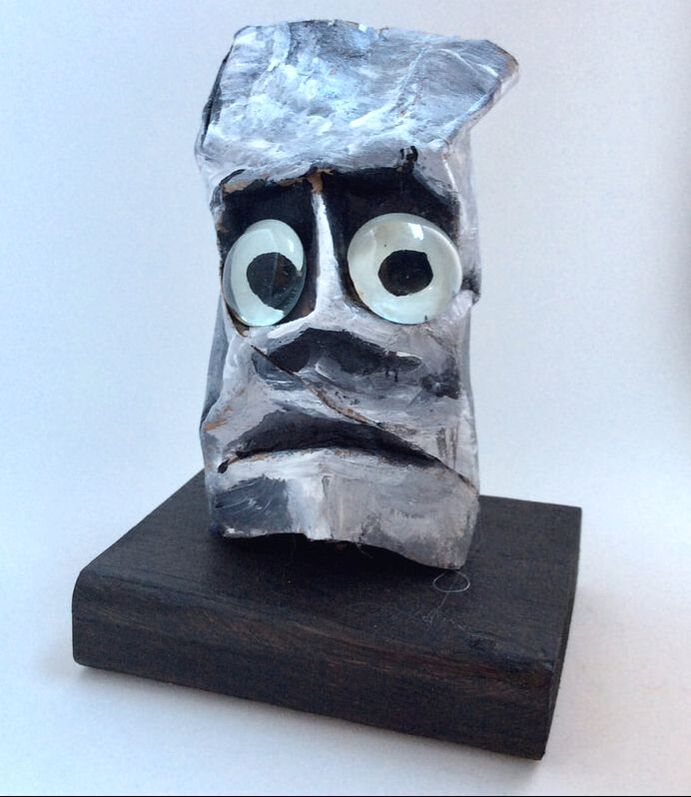
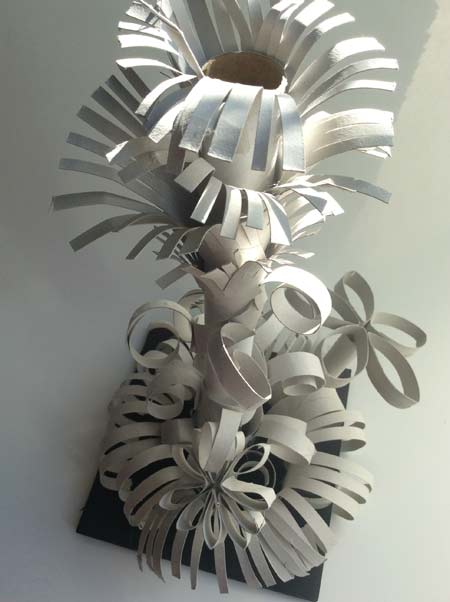
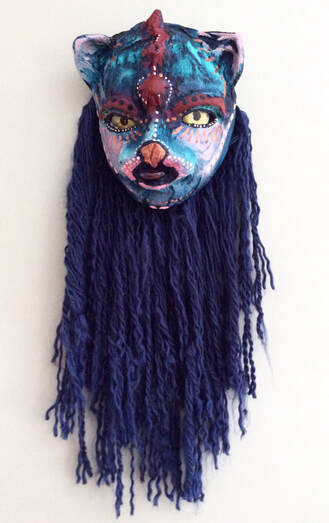 Years ago the kids and I experimented with using modeling clay on a Styrofoam head to make a weirdly inhuman mask shapes. They took forever to dry and the modelling clay was hard to pry out from the paper mask. We painted them but they ended up just sitting around for years gathering dust, never quite finished. I decided to revisit the masks this month and giving them an all new paint job, adding materials to them and creating glass eyes. My first mask redo was a cat like mask with a ridge of bumps up the centre of it's face. Once painted, I added wool to create a mane and painted glass beads as eyes which I then mounted in behind the mask. It looked even better when I lit the mask from within making the eyes light up. 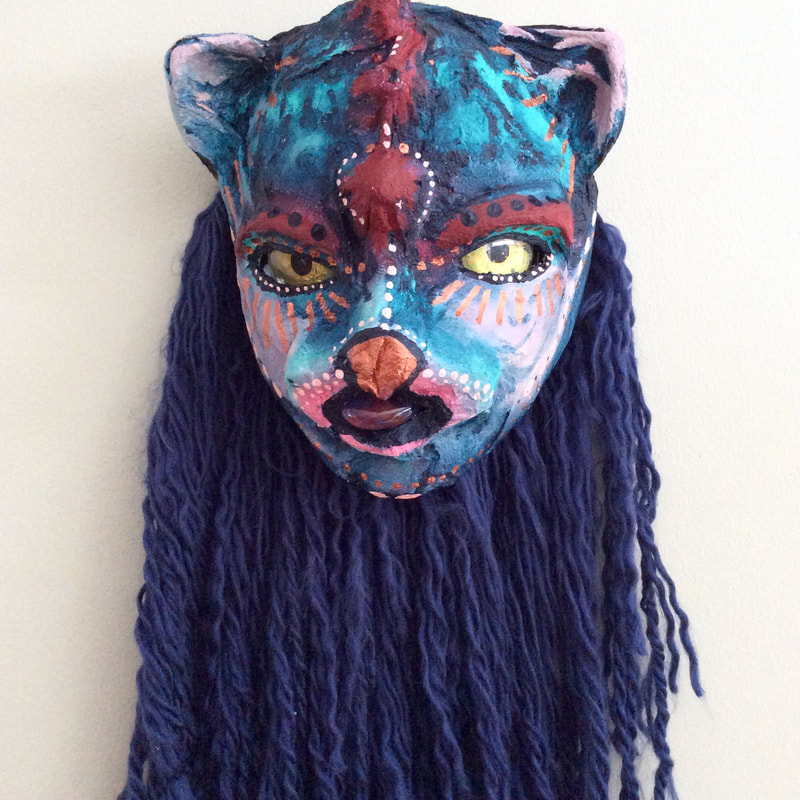 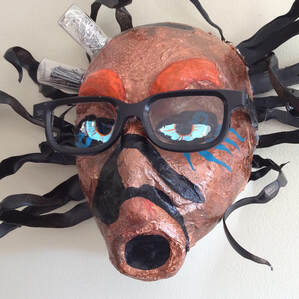 My next mask was a tad weirder. My daughter had originally made the shape by adding modelling clay to the mouth area before papering over top. It had a strange gas mask-like appearance. I ran with this idea but added bits of black spray painted plastic I melted with a match, small glass vials filled with different materials, a pair of glasses and again glass eyes lit form behind. I love how it turned out even if it's a bit creepy. 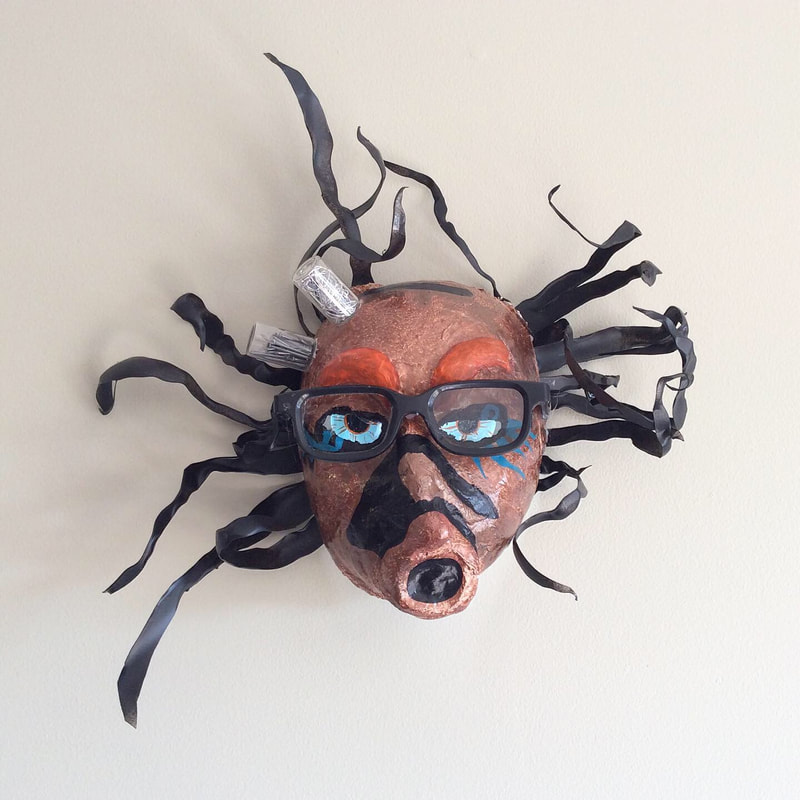  I am always looking for free materials to use in my large drop in classes. Therefore, I rarely throw anything away that may have an artful purpose. So after saving up all my family toilet paper and paper towel tubes I thought about how I could combine them into a sculptural art piece. I was pretty happy with my end result which I had built as an example for a drop in art program I was running. It was really interesting to see what everyone created using these simple cardboard tubes.
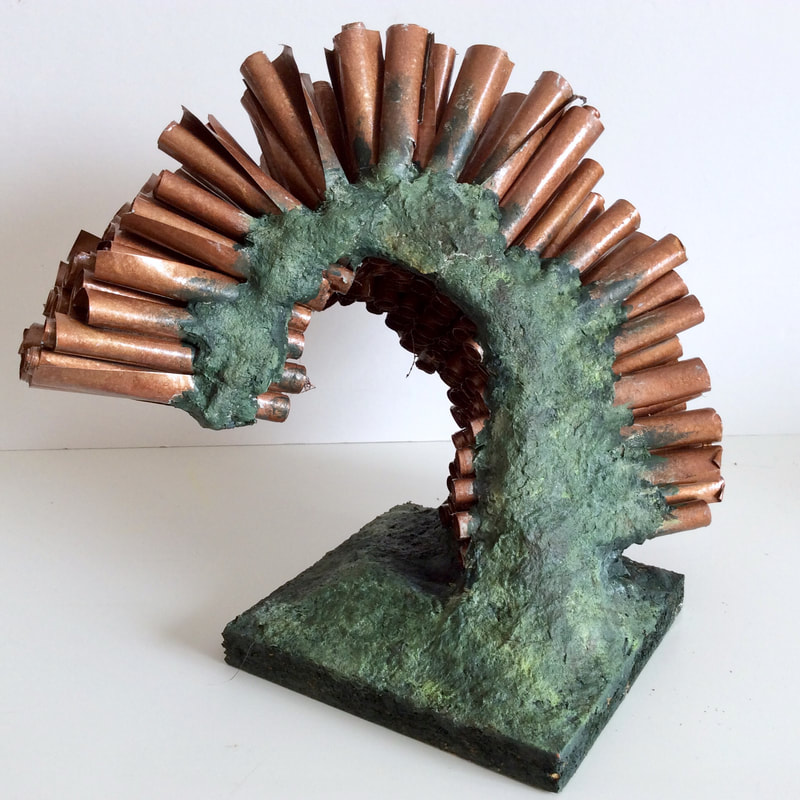
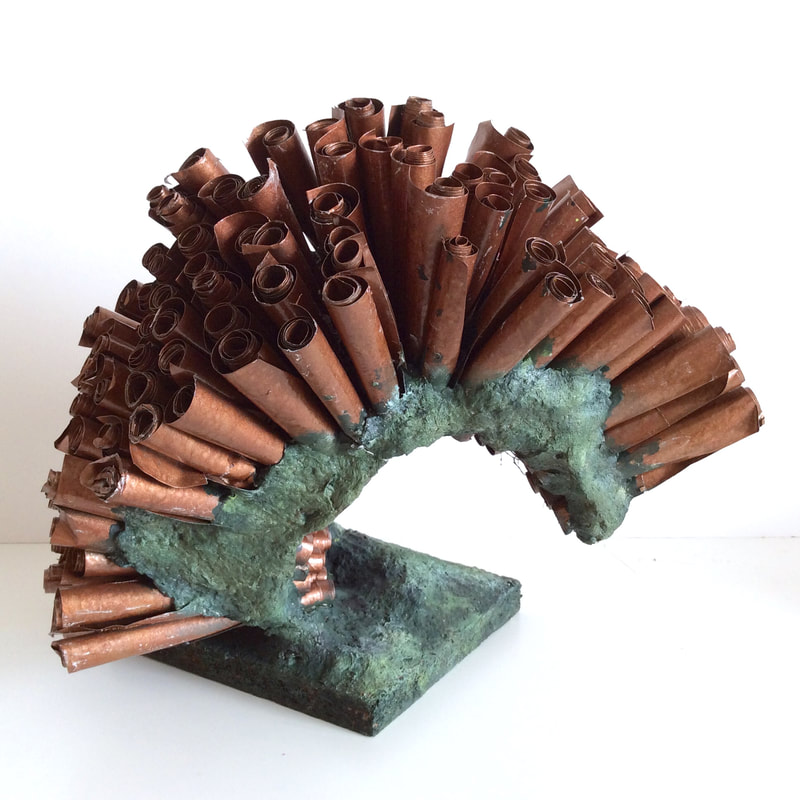
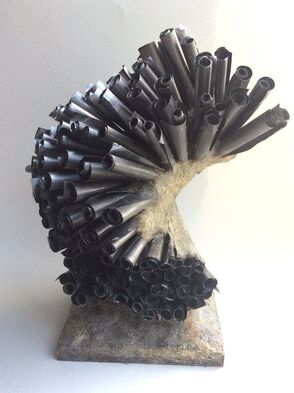 My latest creations are two sculpture created from many different materials, including wood, paper clay, chicken wire and magazines. I had some wire screening scraps, wood and magazines left over in the garage and an idea came to me on how I might combine these elements. I wanted to combine organic shapes with an industrial look as if nature and human construction collided. I love the metallic colours contrasting with the twisted organic and almost coral-like shapes. It looks both man made and natural. It has sparked many idea for future projects in my head along this line of thinking and may end up being the driving force behind several future pieces.
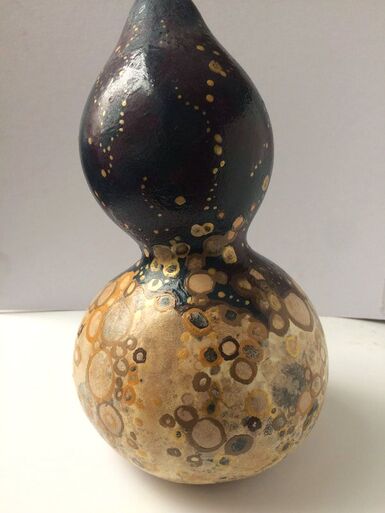 With Thanksgiving and Halloween now past I have been used seeing all kind of decorative squashes and gourds around. I love the textures and shapes that make each on unique. My mother picked up some dried gourds and gave them to me for painting.
The one I chose to work on first had a natural spotted pattern on it's skin. It made me think of the repetition of shapes used in Gustav Kilmt's works. I used that as my inspiration to paint the gourd, circling and reinforcing the existing patterns and adding to it, to create the final piece. I am quite happy with how it turned out. 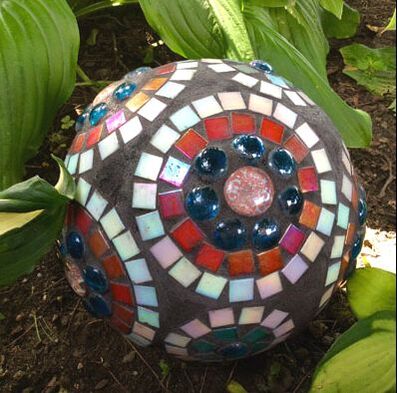 I keep coming across some really neat art pieces that you can put in your garden and one of the ideas that keep buzzing in my brain are the garden spheres. Sometimes they are reflective mirror-like balls and sometimes they have mosaic or glass bead patterns. A couple of month back I bought some glass mosaic tiles which I had no purpose for. I just really liked the colours and the jar of tiles was on the discount rack so it was super cheap. Then I came across a bowling ball at the local thrift store and I knew what my next project would be. A mosaic garden sphere. I read up a bit with some other artist who have tried this to get the right kind of glue (GE Silicon II works great) and started planning out some pleasing patterns with the tiles. I am always drawn to circles so of course I started with that. Then after spraying the entire bowling ball black and filling two of the three holes with concrete I began gluing on the tiles. It took some time since I could only glue on tiles on the upper half of the ball and then I would have to wait until I could rotate the ball to work on another section. I used some glass beads as well that I bought at the dollar store. The large glass beads in the centre of each circle I also bought at the dollar store but I adjusted them by gluing decorative scrapbooking paper to the back of each to make the beads more unique looking. Now that it is done I have a new addition to my garden. It looked awesome among the plants.  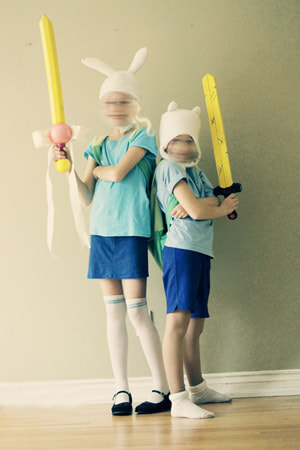 October is Hallowe'en maker month. It was a month of madness that tested my newfound sewing skills to the maximum. First off my twins decided to go as Finn and Fiona (Finn's female equivalent from an opposite reality) from the TV show Adventure Time. I quickly found an online tutorial and pattern for making a Finn hat. Fiona's hat though was move curved and had bigger ears than the Finn hat so I altered the Finn pattern to create a new pattern for Fiona. The trickiest part was figuring out how to wire form the ears so that they remained standing upright. It took two tries for me to get it working right. I was quite happy with the results. For these costumes I also had a make green backpacks for either of them, the sword of their choice (Finn chose the regular sword and Fiona chose the Wish Star Sword) both of which I made using some ideas I found online and then altered to use materials I had on hand. Fiona's skirt I also made using an old T-shirt I cut down to make into a pencil skirt. The kids were thrilled with their costumes and the Adventure Time theme caught on at school with two of their friends wanting to be characters from the show as well. I went back to my sewing machine this time to make a Jake the Dog and Cake the Cat hats for their friends costumes. I started with the same idea as the Finn hats but modified the patterns to create the final look. The four of them looked fantastic in their final costumes and worthy of any Adventure Time cosplay party. Next challenge was for my husband and my son costumes. They both wanted to be Clown Sharks, inspired by the Youtube Rhett and Link Clown Shark video. There was no online patterns available for this. There wasn't even some homemade costumes ideas to help point me in the right direction. Lucky for me I had a small shark costume already that I had picked up used a few years back that was usable for my son. There wasn't a huge selection of shark costumes for my husband though so I decided to make it from scratch...well almost scratch. I found a gray fleece sweater in the local thrift store and using a gray fleece blanket of the same colour created a huge shark head that I could sew onto the sweater. The shoes I made out of an old pair of boots with paper and duct tape. The two of them looked spectacular in their costumes and I was pleased o how they turned out. My own costume was supposed to be something along the lines of a Cheshire cat but my mask ended up looking way scarier than I had intended and I switched up my idea to make myself into The Deadly Black Catshark. I made a cat hat (along the lines of all the other hats I had made) and a scary mask using polymer clay glued to a plastic form. It was hard to see in the mask and super hot but it was fun to create regardless of how little time I was actually able to wear the mask. Since Hallowe'en fell on a Saturday we decided to throw an Hallowe'en party for our neighbors and friends. We turned out basement into a haunted house and decorated the front lawn with ghosts and tombstones. The tombstones were fun to make, using polystyrene sheets, acrylic paint and spray paint. The two ghost we created were made of packing tape modeled on my kids who willingly sat while I wrapped them in parts with tape. With the lights and cheese clothes added, they looked quite amazing. The Hallowe'en costumes and décor are all packed away now with the exception of the jars of human heads. think I will keep them on my shelf as book ends. 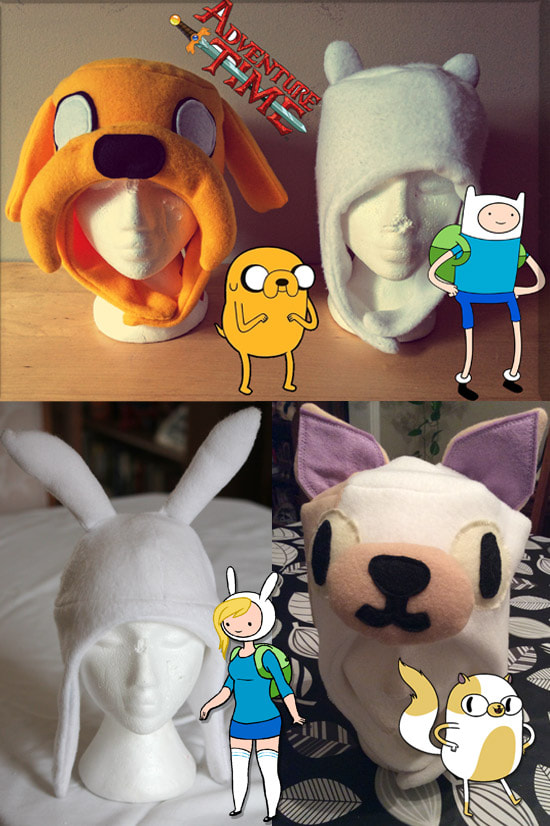  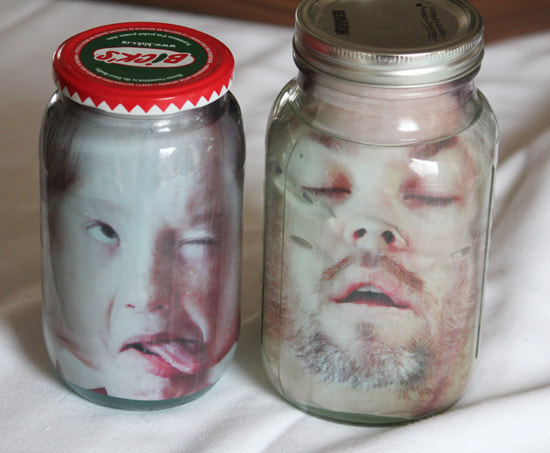 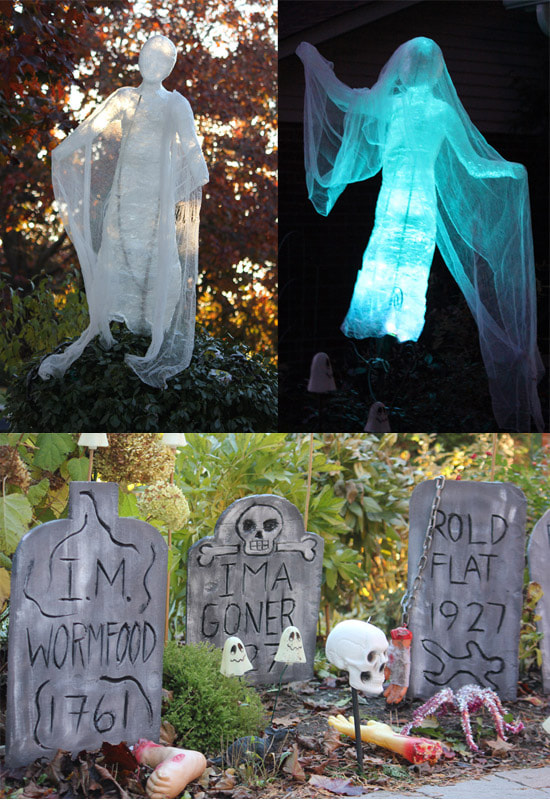 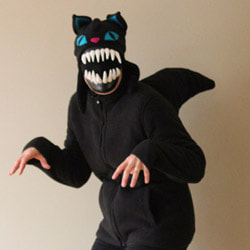 |
Jennifer MorrisonHere is a catalog of my creative adventures and experiments Categories
All
Archives
November 2022
|

 RSS Feed
Site powered by Weebly. Managed by Canadian web hosting from StormWeb